


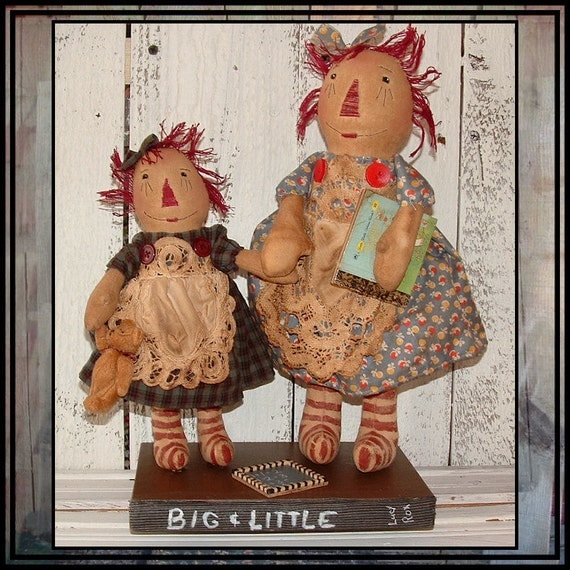
Tips and Techniques in Doll Making
Where to get ideas
Since one of the hardest things for all of us to do is come up with new ideas for dolls, I thought I’d give you some ideas of things to do to exercise and stretch your imagination.
Get out your favorite doll pattern—just the body parts---and lay the pieces out on a table.
Now—get out some of those fabrics that would work for bodies and think about how they might work with your pattern.
There’s muslin of course
Osnaburg which is also cotton but coarser
Painter’s drop cloth from a home store (my sister loves this)
Linen—one of my favorites
Wool-(I found a white wool skirt in a thrift shop and it made a few wonderful dolls—coffee stain gave it just the right shade
Cotton flannel makes great snowmen and rabbits but I've made other dolls of flannel and they had an interesting—I've also painted it and like the effect
Burlap
Cotton twill I made some awesome raggdies from this—the texture was truly primitive
Plain undyed cotton homespun—Walmart often has this and it gives a more rustic look
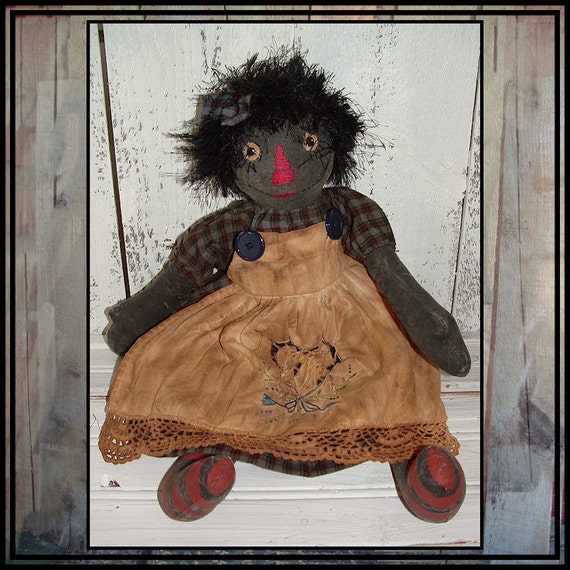
Cotton crepe – I've only found this 1 time and used it for black dolls. The texture of the fabric made it look just like leather after it was painted and sanded (pigskin to be exact). I watch for textured cottons in white or off white every time I shop.
Cotton batting I've use this for rabbits and snowmen
Polyester crepe—I've only used this a few times for dolls I painted black—it was almost as good as cotton crepe
I've even used baby cord wrong side out it has a very interesting texture
After you've explored these possibilities, you’re going to start looking at nearly all fabrics with a new eye.
Now take paper and a pencil and draw the shape of your head all over a sheet of paper. Do you have old coloring books—magazines—children’s story books--look to them for ideas—we’re going to draw eyes, noses and mouths on our sheet of paper. Just shapes—we’re not looking for perfection. Smiles, frowns –remember, eyes smile and frown too. Draw lots of them----I have a spiral notebook I draw in –lots of my drawings are just shapes
You can check art books out of the library—look at the pictures. Have you ever looked at a book of Grandma Moses paintings? I enjoy Picasso and Salvador Dali—their people are almost primitive—have you you ever looked at native American art or pre-Columbian sculptures.
Take a trip to a children’s museum—look at children’s artwork—children aren't afraid of making mistakes like we are.
—I believe I've mentioned before---I can’t sketch my ideas—they look like a 3 year old tried to draw them—maybe worse. But anyone can draw shapes and isn't that what the bodies, heads, mouths, noses and eyes are? Even the feet and hands are different shapes. So draw lots of them too. Fill a page with hand shapes and feet shapes.
As you go along you’ll find that ideas give birth to new ideas and just doing these exercises will help your mind expand. Your ideas do not have to come from dolls or pictures of dolls—they can come from nearly everything you look.
Now—why not cut out a couple of dolls from each of your favorite choice of those fabrics.
We need to talk about stuffing here. You have lots of choices here too.
Polyester fiberfill is the most common and easiest to use
Rags--- make a very firm doll. I usually used fiberfill in the arms, legs, head and rag in the body—rags are a good environmentally friendly choice and are FREE---never throw away your scraps from cutting out your dolls—I've even stuffed a doll that just didn't work inside another doll.
Cotton upholstery batting makes a nice stiff doll
Flax
Grass -- smells nice if you dried it well
Sawdust
Wool
Make the bodies and lay them on the table and look at them. Get out that paper with faces and decided who should have what face. If you want a doll to be painted—do you want to do her face before or after you paint----Pinch stitched noses get done before painting as do my personal favorite—needle sculpted noses and mouths.
Are you planning to applique her nose—a stitched on patch of matching fabric—if you’re going to paint the doll you want to do that first. If you’re using a plaid stitched on nose of course—you’ll wait til after you've stained or painted.
Lastly---are you going to stain her before or after you paint her. If you stain her first—more of the paint will sand off and she’ll look much more worn.
Staining and Painting
Do you get as nervous as I do about “ruining” those dolls you've worked so hard on? I did—it scared me to death that I’d get too much stain on them and not be able to get it out. So—I made little 3” by 5” Pillows of the various body fabrics and stuffed them with the same stuffing's I used for the dolls.
I pinned a small piece of muslin to the corner each pillow with a safety pin and I numbered them. Then I took a sheet of paper and starting with #1---- I wrote each pillow number and by each number I wrote what kind of fabric the pillow was made of and what kind of stuffing I used.
Then with a sharpie, I drew a line all the way around the pillow crosswise so there were 2 places on each pillow to try stain and marked one corner A and one on the other end B. for each stain recipe you try—write it down on the piece of paper so you’ll know ones which you liked and which you didn't.
Now—let’s try some recipes --- and I’m going to give you recipes for very small batches.
My most used for most things recipe is 1/8 C instant coffee (this amount is the same as 2 Tablespoons), 1/2 C hot water and 1 TSP vanilla. This is very basic but try it on a couple of your pillow halves and on your paper be sure to write where you used it. To apply it, I wear rubber gloves (I buy 2 pair packages of the yellow ones meant for cleaning and they last quite a long time and are only around $1)
and I use ¼ of a kitchen sponge to apply the stain (I buy multi-packs of the sponges—I think they’re about 4” x 6” and I cut them in half and cut each half in half.
Remember that the stuffing as well as the outside fabric determines how the stain will work. That’s why the pillows are so useful. This basic recipe that I gave you can be strengthened to ¼ C coffee to ½ c water or even as much as equal parts coffee and water. The more coffee—the darker the stain and the stiffer the fabric.
I hang my dolls in front of a fan to dry them. Many people bake them in a 200 degree to 300 degree oven. Check them and turn them often.
I also experimented with drying them under a Halogen work light. I purchased a thermometer to make sure it doesn't get too hot. I lay the item in an aluminum lasagna pan (that’s what their called in the store) with the light hung by a chain above the pan. They look just like they've been baked in the oven. I think laying them in the same lasagna pans out in the sunshine on a warm day would get the same results.
With that same first recipe –mix a new batch—1/8 C instant coffee, 1/2 C hot water, 1 TSP vanilla and-add 2 TBSP cinnamon while the water is still hot. Mix it well and let it sit a while to get slimy and sludgy. Apply this with your sponge and air dry or bake.
You know how they say you shouldn't keep spices more than a year—I do but ----they say they lose their potency? Well----wouldn't nutmeg, mace, cardamom, cloves, ground allspice, or ginger add to the scent of your stain? Don’t put them ALL together but one or 2 to a stain recipe is certainly better than discarding those old spices. And if you've listened to all the Prim Sisters Talk radio shows, you know you can add cocoa to your stain mix to make it darker and chocolaty.
See the reason for the pillows? You can’t be sure what your stain combinations will do until you try them. You’ll also want to dilute your paint a bit and paint over some of your stains to see the effects. I just used the sharpie and drew through each marked half of the pillow and painted the corner that wasn't lettered so I could still see the A or B and knew which stain was under the paint.
Some of those stains may be darker or thicker than you want and you may want to sand those.
I also like using black walnut stain. Now I've been on a very tight budget and my son has black walnut trees in his yard and is always complaining about the mess the nuts and husks make. Most of the stain comes from the husks but I pick up both nuts and husks.
When I get them home I boil a kettle of water and pour it over the stuff in the bucket. If it’s not enough water to cover the nuts—heat up a bit more. I let this set and steep (just like I would tea) for a day or 2. Then I line an old colander with a piece of paper towel –this acts like a giant coffee filter----and do it OUTDOORS—because -remember this stains---strain the “tea” through the paper towel. It catches the dirt and crud that may have been stuck to the walnuts.
This keeps quite well in a covered container. If you neglected to cover it and it evaporates—don’t panic just add hot water and it’ll turn to liquid again. The only problem with this very cheap method of obtaining stain is ---it’s not a consistent color. One time is darker or lighter than the next—
especially since after I've poured the water off a bucket of nuts, I boil another kettle or 2 of water and make a second batch from those same nuts---I just let it steep for an extra couple of days. And in the waste not want not vein—I put the nuts out for the squirrels who do eat them.
Yes—I do also buy walnut crystals on eBay---you can get so caught up in saving money that you don’t have time to create! The crystals make a more consistent stain as well as darker than coffee or tea but again you want to experiment.
On show 19 in the Prim Sisters Talk Radio archived shows, Angie from Simpletime Primitives suggests pre-staining 3 yd amounts of muslin in a 5 gallon bucket in which you've mixed ½ C of walnut crystals in 2 gal of very hot water being sure to wear rubber gloves.
You can use this recipe as a starting point to stain finished clothing and dolls too. Just remember—this stains everything so I suggest doing it out doors or over plastic drop cloths. After soaking the fabric or dress in the stain, wring lightly (you don’t want to wring out all the stain) and dry from a clothesline, over a bush, throw it over a clothes drying rack set up in the back yard, or lay it out on the grass if you haven’t mowed in a while or it’ll have grass all over it.
So with your stains—experiment a lot. And try different mixtures.
Now I mentioned painting and I've mentioned that you add water to your black paint (I save all my small yogurt and individual pudding and fruit cup containers to use for this) but you can also use a dollop of your stain to thin your paint.
I was in the home improvement store one day and found a gallon of charcoal gray paint and another gallon of dark brown/black deck stain that were paint mixing mistakes and they were only $2 each. Okay—I didn't want to use either of those colors as they were to paint my dolls but for that price I had to buy them. Do you know what I did ? I got out my flat black house paint (yes—I always buy my black paint by the gallon in the home improvement center)----and I mixed it with 1 part of the gray and 1 part of the deck stain. When I use it I add a bit of water and the painted doll is black for a lot less than if I’d used all black paint purchased at regular price. It sands nicely too.
Another interesting thing to try if you've never done so—go ahead and make a snowman and stain it like always. Now I want you to try this first on one of your pillows but the method is-----when it’s dry—get out some flat white paint and a medium size brush. You’ll also want some old newspaper. Dip your brush in the paint and then brush off nearly all of the paint on the paper. When there’s almost no paint left on the brush---- brush some paint on the doll. This is dry brushing and you’ll get a bit of white but not a lot and it’s a great primitive look.
Thanks for the great tutorial Lucy!
Lucy can be found here:


.JPG)


No comments:
Post a Comment