Showing posts with label Cotton Picking Primitives. Show all posts

Tuesday, July 1, 2014

Tuesday Tutorial with Becky from Cotton Picking Primitives

Needle Felting Doll Hair

Here is one of my finished dolls with the natural wool hair.
I wanted to share the needle felting technique I used to give my dolls their unique look.
I tied a few strands with some torn rag strips on this doll.
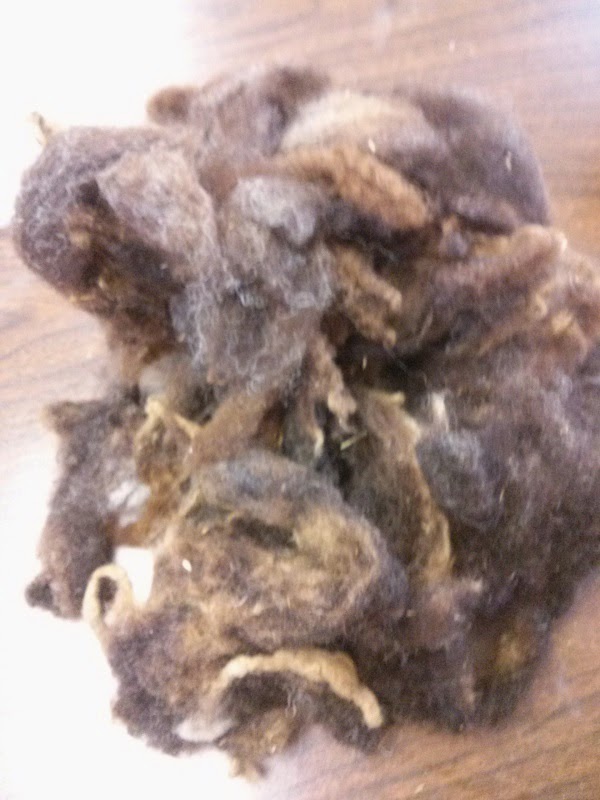
I purchase my natural mohair (goat's hair) from DJ at Dark Forest Folk Arts http://DarkForestFolkarts.etsy.com,.
This is about 2 oz, and it arrives washed, and ready to separate.
Some of the strands are longer than others. I use the shorter ones for bangs, and filling in any bare spots. You can also lengthen some of the strands sometimes by twisting the fibers together, and pulling gently on the ends.
There isn't any particular size needle that works better, but I usually use a 38 gauge triangle point (medium coarse), and it works fine.BE VERY CAREFUL WITH THESE NEEDLES-THEY ARE VERY SHARP!One wrong jab and you can cut your finger.
Any kind of wool will work because it has microscopic scales, like a fish, and the technique of jabbing the wool into the fabric catches those small scales on the fiber, and pushes it below the fabric surface, and locks it into place. I find the process very relaxing.
Just grab a hank of hair, and pay attention to which direction it grew on the animal, and start poking the end which was attached to the animal into the fabric. 
Depending on the kind of wool, I jab about 1/8 inch apart on each piece of hair, and give it a gentle tug to make sure it's attached.

I like to start at the front of the head, and continue across the front, and then turn that section that is finished,upside down, toward the face, and add the next row behind this. Continue unwil you are satisfied with the amount of hair.
Here is a view of the back of the head once I finished felting the hair in place. You'll notice I do not paint the area where the hair will hide the fabric, it makes the fabric too stiff, and may break your needle. I have had that happen.
I used different tones to give her a sun bleached hair look. I trimmed the ends to make it look more groomed.
Here is Cotton Picking Sally, all finished!

Thank you for sharing this fun tutorial Becky!
You can visit Becky here:

Tuesday, June 3, 2014

Tuesday Tutorial with Becky from Cotton Picking Primitives

Drawing a perfectly prim doll face

Today, I am beginning a new primitive doll, and I would like to share the process I use to draw the face onto the pattern, and then transfer it to the doll with you. This is a very easy way to get the features all aligned, and centered so it looks like a real face

Materials needed:
Card stock
pencil
post it or generic sticky note
transfer (carbon) paper 

I use card stock to create my patterns so they are more durable and I can trace around them several times before I need a new one. Use whatever color you prefer.
This is the completed face,drawn on the pattern. Dotted lines mean needle sculpted features, and solid lines indicate painted features. I did the nose is dotted lines to denote that I am going to needle sculpt it, and not paint it in. I am going to do both to the lips, so I just used a solid line for them and the eyes.

You can make make any shape, or size lips, nose, eyes, etc. with this method, and get a mirror image every time. 
This is a very easy way to create different styles of faces.
I discovered by accident that the inexpensive "generic" sticky notes from
the dollar store are transparent, and work well as a small tracing paper.
Lay the note on top of what you've drawn, and trace over the lines onto
the post-it. 

Fold the template in half to find your center for placement. 
Draw 1/2 of your nose, and 1/2 of the eye and eyeball, and half of the mouth at the crease. 

Even though this is free hand, it is very easy to create a half shape, than
a full eye or lip.
Next, I turn the post it note over, and place the other half of the eye where it needs to go. Note that the nose and mouth are toward the outside edge at this point. (Your sticky note will be more transparent,and the lines will be on the under side until you trace over them, I did this for presentation purposes). There is no need to use any kind of transfer paper, the lines you traced on the front will copy well when you draw over them on the back side.
ll that is left to do now is to transfer the pattern to the doll.

I lay the template over the face prior to sewing the doll together, and slip a piece of light carbon transfer paper between the pattern and face, and draw over it right onto the right side of the face..

My next post will include a lesson on painting, and grunging the eyes ,lips,and needle sculpting the nose.

Happy crafting!

Thank you for sharing this fun tutorial Becky!
You can visit Becky here: