Showing posts with label christmas ornament. Show all posts

Tuesday, January 8, 2013

Tuesday Tutorial by Annie of Olde Annie's Primitives

Christmas Ornament Tutorial by Annie of Olde Annie's Primitives
 
 This is a Christmas ornament I made for my daughter.
She works for the Seattle Times and is a big sports fan.
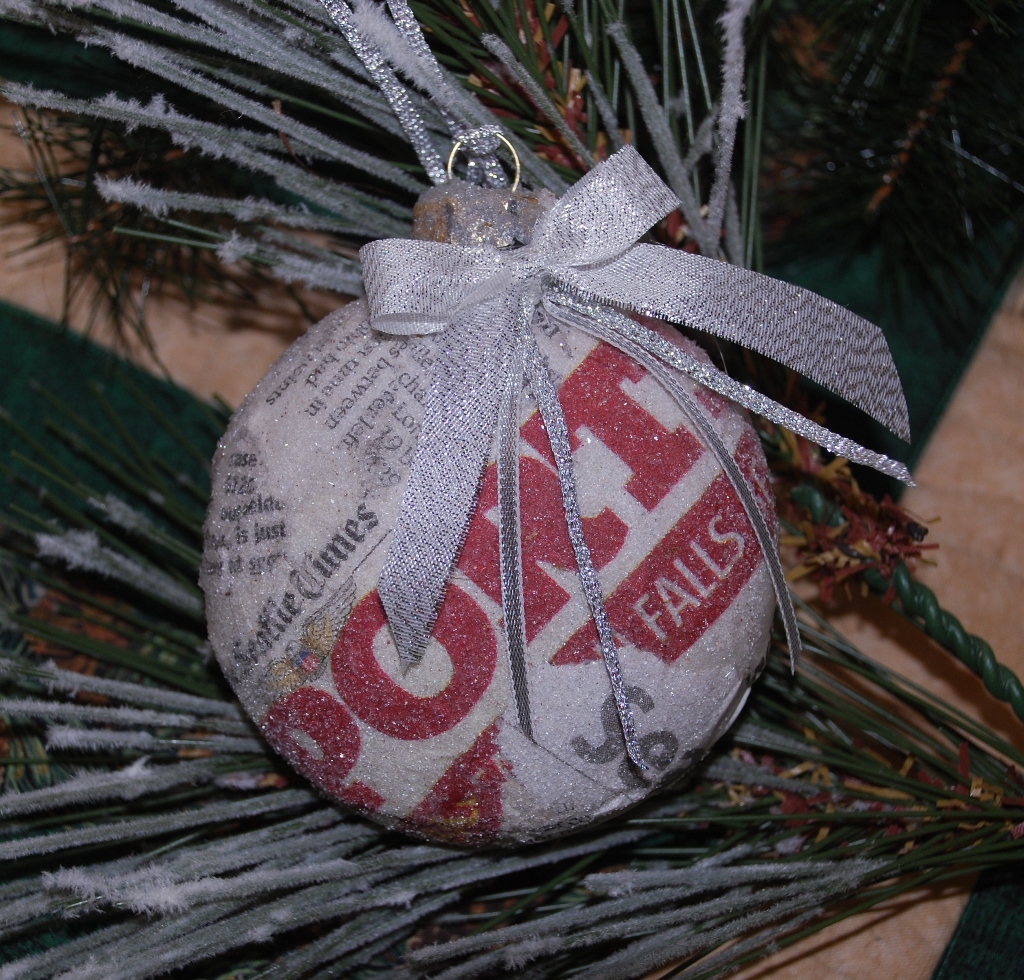
So I took a clear flat shaped glass ornament (I preferred this shape over the round ball shape) and used the sports section from the Times to make her ornament.
I liked the red in the title...it gave it more of a Christmas feel.
I made sure to get in key elements on the ornament, such as the Seahawks, Mariners and the date of the paper.
This way she will always know what year I made it. I finished it off with a light coating of glass glitter and some silver accents. I love how it turned out.

I ripped significant pieces and head lines from the sports section and used Mod Podge to glue all the pieces on, making sure the entire ornament was covered.
Once it was completely dry, I coated it with Mod Podge again and sprinkled the glass glitter on.
After that dried, I made the bow and accents using three different ribbons. I used one of the ribbons as a hanger, too. I chose the red side for the front and below is the back side.
A great idea to use throughout the year!!
Thanks Annie for sharing.
You can find Annie here:

Tuesday, September 25, 2012

Tuesday Tutorial with Valerie of Yorkie's Primitives

Christmas Ornament Tutorial

 I want to share this adorable Snowman ornament that you can make with your kids or grand kids. This ornament can be done in a couple of hours.
This ornament is adorable for a baby's first Christmas but it is also just as cute for any age.  It is an ornament that you will cherish for years to come. I wish I could take credit for this ornament but I can't. My daughter, Laura, is the one who showed me how to do it.
All you need is a ball ornament. You can choose any color but we chose blue. The smaller the child, the smaller the ornament you can use. The larger the child, the larger the ornament you will need.

White acrylic paint
Paint pens in black, red and orange
Poem, which will be attached
Satin spray sealer

After you choose your ball, paint your child's or grandchild's inside hand, fingers and all white. Immediately have them gently grip the ball. While they are gripping it, take your fingers and gently press each finger and palm down so that the entire hand print is on the ball. Do not press too hard because you don't want to break the ball.
Let this dry. It only takes about 10 min.
Next you will make snowmen out of each finger and thumb. Take your black paint pen and just draw him a small hat on top of his head. Then paint his eyes and mouth with the black. You will also put his buttons down the finger with the black pen.
Then take the orange paint pen and draw him a carrot nose. Take the red paint pen and draw him a scarf around his neck. I just took the pen and drew a little fringe at the end of the scarf.
If you are careful, you can paint all this at one time. If you think you might smear the paint, just let it dry between paintings. I started with the pinkie finger, finished it, then came backwards with each finger until I got to the thumb. This way, you are less likely to smear the paint and you can paint it all at the same time. Attach the poem with a piece of ribbon or red yarn and when it is dry, spray lightly with satin sealer. Your ornament is ready to hang on your tree.
Here's the poem.
You can right click it and save it to your computer or you can copy it and type it the way you want it. I hope you like this ornament as much as I do.
 
Thank you so much for this fun tutorial Valerie!
You can find Valerie here: