


Doll Face Tutorial;
Eyes Noses and Mouths
Most of the doll’s character is going to come from his or her facial features so
I’m just going to make suggestions here and you think about them when looking at those sketches of faces you drew in your spiral notebook.
For eyes think about these possibilities
Button eyes are great—Don’t just use black—there are so many other colors that are very effective. I love tortoiseshell eyes
Have you ever stitched the button on going from the center over the outside edge? It gives you wonderful multicolored irises.
-have you ever thought about layering 1 button on top of another larger one
How about stitching a circle of fabric on the face and attaching the button to the circle—this is especially effective on black dolls—after their painted of course
but I also paint scraps of my muslin with white paint and sand them and attaché the circle before I stain the doll. The circle accepts stain, but not as much as the body fabric.
Instead of a circle—make an elliptical or almond shaped piece to place behind the eye button. You could paint the almond shaped area on the face and place a button on it.
You could paint the entire eye. Whichever of these methods you choose, you can also cut an almond shaped piece in half and stitch these in place as upper eyelids.
You can also use sewing snaps---either half. You can put a circle of fabric, paint, felt works well—behind the snap.
I've seen rusty bells used as eyes—also beads.
How about the straight hook part of a hook and eye—you can put a bead above or below it for another look.
And don’t forget—you can embroider the eyes or make them entirely of stitched on fabric.
There are lots and lots of possibilities
---------------------------------------------------------
Now for noses—how many different noses can there be?
Stitch over a stick or a rusty square nail
Or poke a hole in the face and squeeze in some white glue and poke in a stick or a rusty nail.
Applique-- that’s just a fancy word for a stitched on piece of fabric- a triangle—matching or contrasting
How about a U shaped nose or a V shape for a witch or crone. Have you thought of a rectangle or square?
---do you know you can make it of 2 layers of fabric and add some stuffing to give it dimension? You can add stuffing to any appliqued nose.
You can make a pinch stitched nose
Ever thought about a needle sculpted nose?
It’s really not that difficult. Draw a nose with nostrils----they can be wide or narrow, tall nostrils for a big nose or short nostrils for a very primitive nose.
Now start like you do for a pinch stitched nose and got down to the nostrils.
The only difference here is now you change direction and go from the top to the bottom of the right nostril and then the left. And you don’t have to change direction—turn the doll’s head and you’ll still be going side to side but following a different set of lines
Are you doing a small doll---stitch the straight part of a hook and eye vertically for the nose.
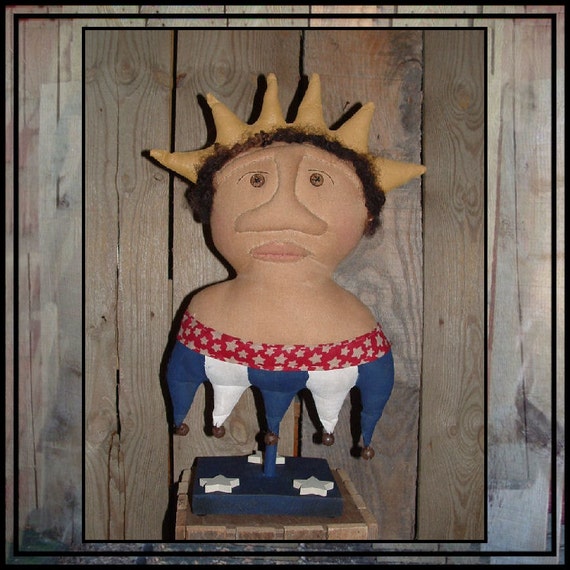
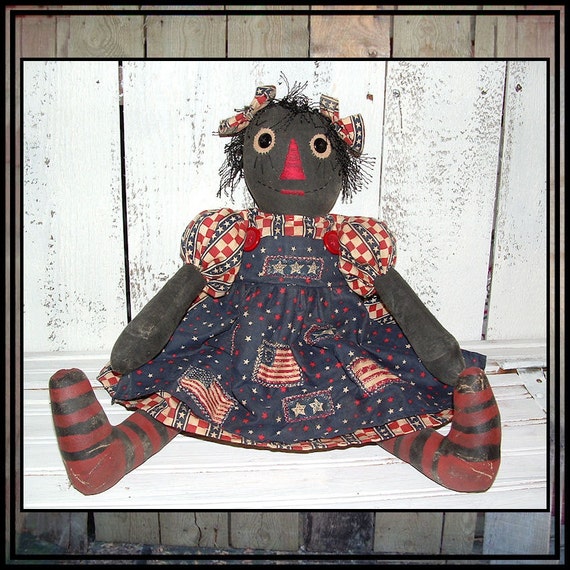
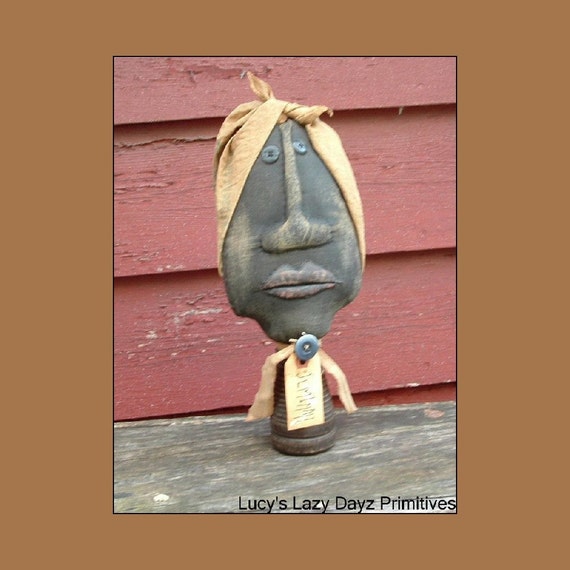
There are an endless variety of ways to do mouths..look at the images I've provided and we’ll explore some of them and how to do them.
The easiest and simplest is a straight line, stitched with a single stitch. Or—the straight line can be made by stitching over a stick you've laid in place on the face –the snowman is an example of this. I've also seen a mouth stitched over a length of jute twine. Or—you can do a single straight or curved line of running stitch, 1 or 2 strands of embroidery floss seems to work best.
The doll on the bottom right has a stitched mouth that’s created with 2 curved lines of running stitch.
The scarecrow, shown second from the right on the top row, was done by drawing a straight line. Then I stitched tight half cross stitches from one end to the other --and crossed them going back to the starting end.
Raggedies mouths can be done with running stitches in black or red. In the case of the one on the middle row, right end, I did 3 or 4 horizontal red stitches between running stitches of black. The one in the bottom row was stitched with uneven vertical red stitches. Then I sanded her face before I stained it. You could also stitch a heart shaped mouth with red.
The prairie doll on the top row, right end, has a mouth drawn with an ordinary pencil. I sprayed it with sealer to protect it—the sealer I use is ordinary CLEAR spray paint from Walmart—it’s less than $1 a can. You can draw most any face in pencil but keep in mind that the coloring is subtle.
The beautiful doll on the bottom left has an embroidered mouth. Use 1 or 2 strands of floss to keep the look soft and delicate. You can sand it before staining the doll for a much more worn look. This kind of mouth is just as beautiful if it’s painted on the doll.
The others are all versions of needle sculpted mouths. The black doll in the middle row, second from the right has a pinch stitched mouth that I stitched following a curved line.
The top and middle dolls, second from the left, have a double row of pinch stitching for mouths. To do this, stitch one entire lip, starting at either end, stitching between the lines that mark the top lip. When you've finished the top lip, do the bottom lip stitching only on the lines of the bottom lip. If it’s more comfortable for you, turn the doll’s face a quarter turn clockwise and you’ll be doing a very ordinary pinch stitch.
The dolls with more realistic lips are not all that difficult. Draw lips on the doll with blue washout marker or the new wash out pencils that come in blue, pink or white. Thread your needle with heavy craft thread and knot one end. Wiggle the back end of the needle in the weave of the fabric to make a hole between the threads. Doing this doesn't cut the threads so it doesn't weaken the fabric. When you have a small hole, insert the point of the needle coming out at the center of the top lip, and give a tug when the knot meets the hole so it goes inside the hole and disappears.
Now—think to yourself—I’m doing a pinch stitch, I’m doing a pinch stitch--- because that is what you’re doing except it widens and narrows as you go. Go from the middle to the outside corner of one side of the top lip and then go back to the middle and stitch your way to the outside corner on the other side. The bottom lip can be done from one side all the way to the other but you want to stitch only that lip from the line between the lips to the bottom of the bottom lip. If you try to go from the top of the top lip to the bottom of the bottom lip—your lips will flatten out and not have such wonderful dimension.
I Like to draw an S shape lying on it’s side—very loose for a doll with a puzzled look. This mouth is a good one to stitch with a pinch stitch. You can make a short line just below the middle and pinch stitch the length of that for a lower lip.
I've made a pumpkin man with a big grin….I drew a second big grin 1/8” inside the first one and pinch stitched the entire outline.
How outrageous do you want to be? I stitched zipper teeth in place for a mouth. I've seen as well as made mouths by stitching a muslin shape in place and embroidering a straight line on it with black. This is the way I make the mouths for my Belindys.
How about stitching a rectangular black, brown or red patch of fabric on the face for a mouth, or a patch cut from a piece of muslin that you've painted and sanded. You can then satin stitch teeth on it or French knot teeth or even tiny button or bead teeth. You can stitch around it with red or tan for lips. I think using a piece shaped like a tree leaf, pointy at each end and doing tight half cross stitches all the way around would give it a look of thin old lady lips.
One of the first dolls I ever made for selling had an embroidered smile—just a little stem stitched curve—with 2 little button teeth and I called her Toothy Ruthy. She was my Sister-in-law Patsy’s idea.
Not all dolls have to smile—you could make an unhappy doll with a down turned mouth but I’m not sure she’d be as appealing.
Have you thought of making a doll with an embroidered mouth where the lips don’t meet in the middle (for an open mouthed look)? You could stitch a sewing snap there and the other half of the snap on a dolls finger or thumb.
Before I started making needle stitched lips, I drew lips on a piece of paper and added a seam allowance all around. Then I cut them of muslin and stitched around the outer edge. I then cut a small slit through 1 layer and lightly stuffed the lips. Quilt the line between the lips and stitch the lips to the face. I stopped doing this myself after one not very nice person saw my doll in a shop and tore her lips off to keep as a souvenir and destroyed the doll in the process. I was very very upset.
Have you ever seen a bound buttonhole on an expensive wool coat? I think that would be a wonderful mouth and want to try that sometime.
Become a people watcher…you’ll get lots of ideas.

Thanks for the great tutorial Lucy!
Lucy can be found here:


.JPG)


1 comment:
What a wonderful Tutorial!! Love all of the different ideas! Thank you, Lucy! Love your work!
Vicky
Post a Comment