


Doll Bodies, Hand, and Feet

If you’re anything like me, you have maybe 6 favorite doll patterns…….3 large and 3 small,….that you make over and over. Wouldn't you really like to do something different---make different dolls than usual---but you just do not have time to learn how to make up a new pattern or maybe you don’t have the extra money to buy new patterns right now, during tax time?
Well—these tips are for you. You know I like to experiment and I like to play. My mother taught us this trick with clothing patterns as soon as my sisters and I started sewing for ourselves. It works even better with doll patterns.
Get out those 3 favorite large doll body patterns –you’ll want patterns that are a similar size. Now, so you don’t get too confused, you’ll want to number the body pieces and the arms and legs that go with each of them---------number 1, number 2, and number 3.
Check out my sketch with it’s mix and match chart and you’ll get a clearer idea of what I’m talking about but here goes:
Lay out the 3 body patterns. Now add a leg and arm pattern from a different body to each of the original 3 bodies—You do have to check and see if the legs will fit. To do this, Fold the body in half lengthwise and lay the leg onto this piece—if it’s not more that ¼” wider than the half of body pattern, it will work as it is, other wise,trace the leg onto another sheet of paper…..making it just a little narrower.
Now you already have 3 new patterns. There are a total of 8 new possibilities for each original pattern just by remixing the arms and legs ---again and again. If you refer to the table, it gives you the different mix combinations for your pattern pieces. I’m sure I may have missed some.
Are you feeling excited thinking about all the possibilities, Feeling like being more adventurous? Trace the faces of each pattern onto separate sheets of paper. Why not trace the face from body number 2 and the face from body number 3 onto the number 1 body? Then you can use face 1 and face 3 on the 2nd body, and face 1 and face 2 on the 3rd body—6 more new looks and when you multiply those 6 by those first 8 new possibilities you’re looking at 48 new looks for your 3 basic patterns.
Did it even occur to you that you can also shorten or lengthen the legs, the arms and even the bodies? If the doll has a plain old mitten hand, you can quilt fingers onto it
Mixing and matching parts like this whenever you cut out a new doll means nearly every one of your dolls becomes a one of a kind.
You can not do this with another designer’s patterns though and call them your own original designs—they’re still the work of the original designers, you've simply mixed up the parts for new looks.
Go back and listen to the archived shows about faces…and…..you’ll have so many ideas you won’t know which to try first.
Don’t forget—these dolls can be made of nearly any fabric you choose. Then they can be simply stained, or stained and painted black.
If you’re not good at making clothing patterns on your own,—use the clothing pattern that originally belongs to the body and then you will only have to lengthen or shorten sleeves and or skirts.
Don’t forget to write down which combinations you really liked ………When you've made dozens of the new large dolls—start playing with your smaller patterns.
If you have any questions about this, feel free to email me and ask, I think everyone has what it takes to create their own looks…you just have to learn how…. to work with what you have and how to stretch your imagination. Don’t be afraid to experiment.
Hands are important for lots of reasons. They don’t just hold an item, they can also convey an idea or say something just as they do in American Sign Language.
The first image shows the very primitive, very simple peg arm with no details to indicate anything. This would have been easy for a child to draw and looks very antique.
Image #2 shows the mitten shape we’re all most used to. It can be done in any size and is great for both black and white dolls …but I wonder if you've thought of these ideas. Making just the hand part of number 2 in a color and slipping onto an image 1
hand as a mitten. Or onto a twig arm as a snowman would have….they really need something to warm their hands in the winter.
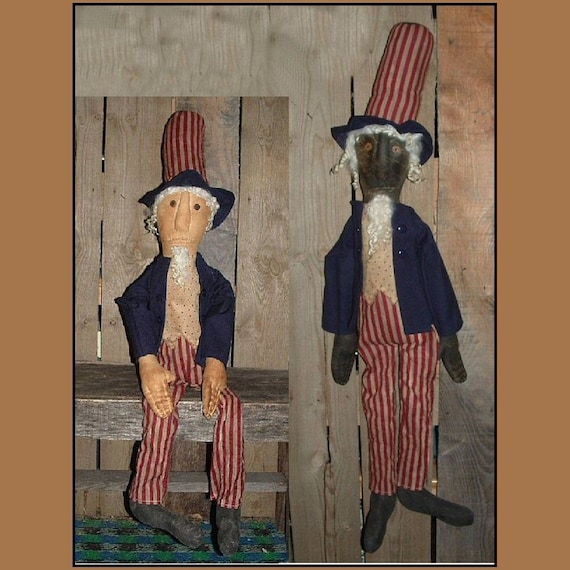
I like the #3 style. I've used it on Santas and Uncle Sams as well as other dolls. It looks great on colonial era dolls and I think it’s a great style for civil war dolls. The fingers can be quilted as well as left in the mitten style.
Number 4 is another version of the mitten hand but I've made the thumb longer. I made a doll with a fishing pole and I couldn't wrap his hand around the pole. With the longer thumb and longer finger area, it worked. It also hold a slingshot or bouquet of flowers.
Number 5 shows the same hand with quilted fingers. If you want a fist, curve the fingers toward the palm of the hand before you cut the thread and quilt through to the back of the hand keeping the new stitches over the stitches you’ve already taken. This one is wonderful for babies, toddlers, and dolls holding pinwheels, kite string or flowers.
The 6th one will be hard at first if you don’t draw but try this. Lay your hand on paper (like you did in kindergarten) and trace around the fingers.
You want to draw these so you have enough space between the fingers to cut and still have enough seam allowance that your seams don’t pop.
I suggest sewing the seam twice with a very very short stitch and taking at least 2 stitches between each of the fingers. It’s easiest if you get a set of tube turners for turning the fingers right side out but if your fingers aren't too small, a soda straw can be pushed into the finger and the back end of a small crochet hook used to poke the material into the end of the straw. This is such and easy way to turn fingers and toes right side out.
You can scan your hand drawing and re-size it to several smaller sizes. Print them out and add the cutting line. I just draw lots and lots of hands different sizes and I’m always sure to find one that fits the arm I wish to use it on.
The hand doesn't have to be perfect. One of my favorite dolls has individual fingers but they’re all the same length and look almost like the front digging paw of a mole. She’s dressed in colonial clothing and the face looks a lot like the Schneeman dolls.
You can also cut this hand (just the hand, not the arm) from muslin, or osnaburg to make gloves for gardening dolls or scarecrows and I've made them with the seams on the outside as well as turning them right side out. Do rabbits dig in the garden? Possibly…
Then of course you could also cut them from dark green or navy flannel to make gloves for your santa instead of mittens. And don’t forget that poor snowman..
Number 7 is very much like number 6 but I separated the index finger. That way you can make an Uncle Sam pointing saying (we want you). A child can be saying I’m one. Separate a second finger for “I’m two”. Quilt the remaining fingers and fold them over the palm like you did in example number 5. Why not look up American Sign Language for other possible things to say with your hands
I added #8 because sometimes you just need to have a bent arm. It’s easier for the doll to be holding something in her arms. To get the elbow in the right place, fold the top of the arm to the wrist and draw across the fold.
Trace the arm on a separate sheet of paper and trace the fold line as well. Make a mark about ½” toward the top of the arm and another about ½” toward the wrist. Fold the thumb side of the arm so these 2 marks meet and tape with cellophane tape. You now have a bent arm.
One of the dolls I make has this type of arm and I stuff the arm all the way to the top so she can wear a sleeveless dress.
I’m sure you’ll think of lots of other possibilities.

Just changing the feet will change the entire look of the doll. Looking at the image, a is a simple clothes peg leg with no shape added for a foot. This is the simplest and by far the most primitive.
B is a wonderful shape for lady dolls but also for Santas, and angels ..it’s the basic stocking shaped foot but elongated and made so it points slightly downward. You’ll notice the arch is delicately curved like a dancer’s would be.
C is also your basic stocking foot but see the line? Draw the line with blue wash-out marker or pencil (there are erasers made especially for erasing fabric). Paint below the line and you have dancing slippers or dress shoes.
D is the same except I've added a strap and I sew a button to the outside of the foot where the strap is attached.
E is once again the simple sock shape. I like the top quite tall for these boots. Remember, when the pioneers were traveling westward, the ladies wore men’s styled shoes to protect against snakebite among other things. This particular sketch shows a tied boot. Before you add the laces, be sure to sand your boots if you want them to look well worn—they’d be pretty shabby by the time the got the poor woman from St Joseph Missouri all the way to California or Oregon.
Put a long length of crochet thread in a needle with a good sized eye –not too awfully big but if It’s too small, the thread will just not follow the needle through the holes. Start at the top and insert the needle coming out the top spot on the other side. Now take a stitch diagonally downward and insert the needle going straight across---the dotted lines on this diagram—we’re still on e---are where the laces are under the fabric.
When you get as far as you want on the toe of the boot, work your way back to the top crossing the first stitches. You’ll have to run the needle under the fabric coming out on the opposite side of where you want to be and take a tiny stitch to get back to there. Tie it as you would a shoe and either double knot it or dab a tiny bit of white glue on the knot so it doesn't come untied.
F has a very simple shoe. Lay your leg/foot pattern on a piece of paper and trace around it adding about ¼” as you go. The height will be between ½ and ¾ of an inch above the actual foot. Cut 4 layers of fabric. Each shoe takes 2. Sew from the ankle front (sketch h has that marked) around the toes and up to the top of the back of the shoe. Turn it right side out and fold this “collar” down. Put it on the foot and take a stitch through the front of the ankle and tie it in a knot or bow leaving about 3/8” of shoestring before cutting the threads.
The next one--G is fun! I love high heeled shoes on my witches as well as some of my Santas and Uncle Sams. I've drawn the outline with a heavy line. You’ll draw the area where the heel is (do it on a scrap to test it because fabric doesn't come out in exactly the same shape paper does. Be sure to add a seam allowance and you may need to trim off some of the top of the shoe to get the look you want. You’ll also need to clip into the area where between the front of the shoe and the heel before you can turn it right side out.
Do you want to make your dolls foot the correct size to fit an old pair of children’s shoes? See h. You want to draw the foot so the length from ankle front to the toe is no longer than the length of your shoe from the opening front to the tip of the toe.
Also measure across the shoe and be sure the height of the foot isn't greater than that. If you’re going to put socks on your doll You may need to make the foot a little smaller so cut a practice foot from a scrap of leftover fabric and stuff this and see if it fits in the shoe.
When you do the real one, tack the bottom of the sock to the bottom of the foot with needle and thread and add some white glue inside the shoe to keep them on the feet and be very careful to put the shoes on the correct feet.
I've saved the best for last. I’m asked frequently how to do a real looking foot. See sketch EYE. Trace your sock shaped foot pattern onto a piece of paper. Draw a V shape into the side of the foot. Raise the top and lower the bottom of the foot at the toe extending it a little—you’ll want to practice these on scraps as well.
EYE – 2 shows the finished shape of the pattern. You stitch from the top of the leg on the front to the tip of the toe on the top and then stitch the top of the leg back to the tip of the toe on the bottom. Refold the foot so the top of the foot seam matches perfectly with the bottom of the foot seam. Sew across the end of the foot. Turn the foot right side out.
If you want toes, mark them with pencil or blue marker. The top of the foot seam will be under the stitching between the 2nd and 3rd toes. The stitching is ordinary quilting. Be sure that you make a left foot and a right foot.
I've also drawn a sketch for a foot with a separate big toe. You have to draw a big toe and pencil in the side of the 2nd toe. Allow about ¼ “ between these 2 toes because you have to clip here. You may want to stitch the seam twice so it’s strong enough and be very careful to not clip through any of the threads.

Thanks for the great tutorial Lucy!
Lucy can be found here:


.JPG)


1 comment:
Great tutorial Lucy!
Post a Comment